When I started this blog, I was a highschooler with great enthusiasm and spirit, hoping to greatly expand this hobby. However, as I entered college, the business and hassle of life put this hobby to a stop. It's a dying dream, if you wish to say so (but I won't stop collecting dice!). However the dream won't end here. I'm here to share my several years experience of on-and-off making gemstone dice at home so that YOU can make them yourself at home.
There's something special about dice made from gemstone. No, I'm not talking about glass (such as goldstone) nor powdered gemstone cast in resin. It's about REAL, NATURAL gemstones. They're simply one of a kind, and feel significantly different from plastic dice. Making one yourself is an entirely different story. It's like sculpting your minis and painting them. It's just that feeling of attachment that lasts forever. And to mention it, these gemstone dice will probably outlast me and any minis I (wish I) have.
There are quite some manufacturers of these gemstone dice, but choice is rather limited, and the price is steep. I'm here to surprise you, that it IS possible to make one at home. Some exceptions aside, there are only some basic knowledge to know and tools to get, and after trying once or twice you'll get the hang of it.
This article is about making a dF or d6 (or any variant), more details in later posts.
 |
| This was literally my whole dicemaking tool lineup, |
So to get started, what do you need?
- Rough/tumbled gemstones
Try finding affordable gemstones, and check their properties on wikipedia.org or mindat.org. Some gemstones (quartz, agate, amethyst) are incredibly tough and some (serpentine, howlite) are easy to work while still affordable and beautiful.
- Tools: Grinder, Sandpaper, and dremel (if you wish to engrave your dice with pips, numbers, etc)
I used an old, hand cranked grinder with grinding head for glass/ceramic. If you have an electric grinder and diamond saw you will be able to speed up production up to around 80%.
- Measuring tools: Caliper and try square
They are used to measure your work, if you have cut them to the right size and check the angles between the sides.
To illustrate the process, this is how I made this simple serpentine d6.
 |
| A chunk of serpentine! Pardon me slippers. |
- Start with a chunk of rock. Grind down a side until it's flat. You want the flat area to be large enough for your dice (e.g. if you want to make a 12mm d6 make sure that you can put a 12mm square inside the flat area)
- Grind the opposite side flat, then use your caliper that they are parallel to each other (i.e., they are equally thick wherever you measurent). Now, grind them to the desired thickness (12mm in this case). If you have to grind a lot, you can use a diamond saw to cut the rock. However, note that you still need to finish the surface of the dice so don't cut exactly 12mm, but leave a bit 0.1 or 0.2mm extra.
 |
| Flat on opposite sides. |
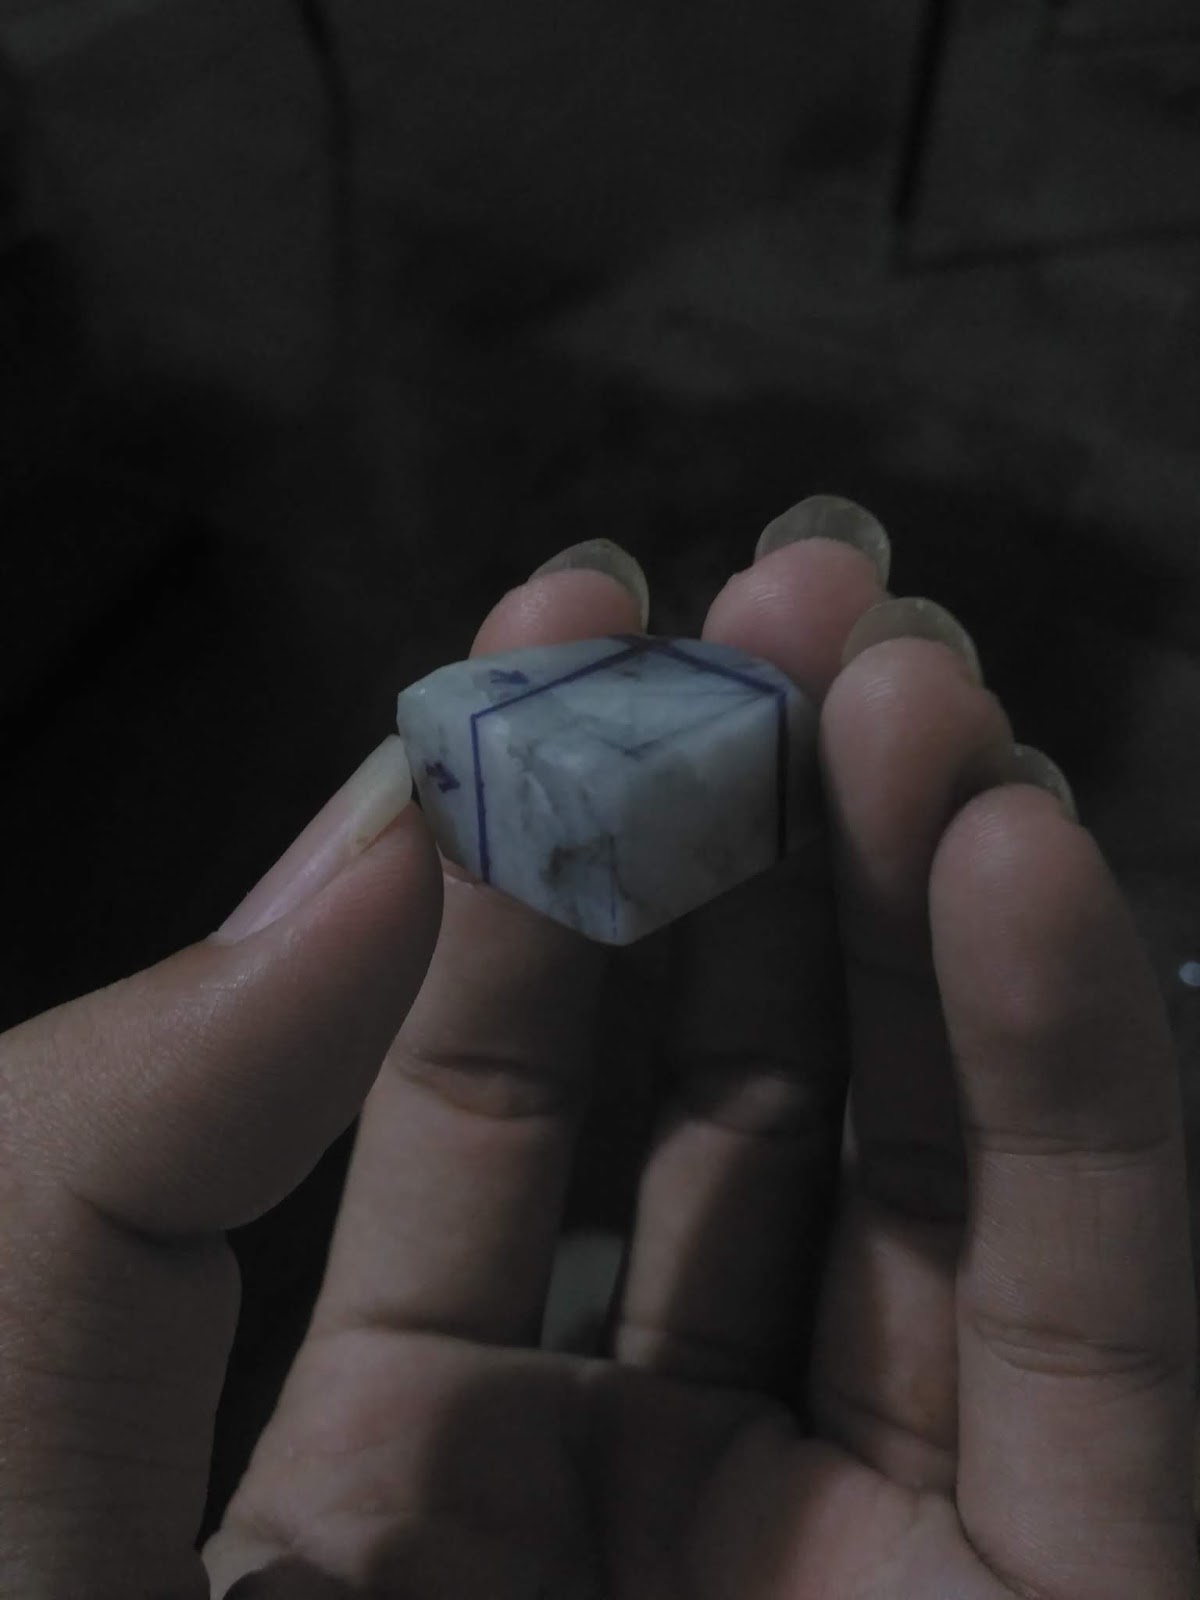
- Draw a square on one of the flat sides. Grind or cut away the area outside of the square. Don't cut too close to the square since you risk to over-cut the rock.
 |
| Removing the excess. Notice the faint marks of a square with its diagonals. |
- After removing most of the unused area, carefully sand down each opposite sides to the desired thickness while keeping them parallel. Make sure that the andacent sides are perpendicular to each other, so you will
get a perfect cube. Pro tip: mark your original sides to use as a
reference side so you don't get lost and end up skewing the dice.
 |
| The cube is done! Note that I mark the sides R for reference and OK if they're already properly cut |
- If you done this carefully, congratulations! You have a gemstone cube! You can just put some dots with a marker and start rolling, but it wont look as nice as a properly finished dice.
 |
| Beware that stones like agate, quartz and their family are very hard to engrave this way. |
- Now you need to engrave the pips or numbers on the dice. I used permanent markers and rulers to pinpoint where I wanted the pips to be. Then I carved the pips by vertically pushing the dremel onto the cube. Note that this may harm the dremel motor and/or the drill bit/burr. I used dental burrs because they're rather small and inexpensive.
 |
| After finishing with some sandpaper. |
- After getting done with the pips, you can start sanding the faces, edges and corners of the dice. Be sure to sand each face, edge and corner with equal force and angle to get consistent results. And then use finer and finer sandpaper (1000 grit would already IIRC).
 |
| Waiting for the paint to dry. |
- With most of the finishing done, you can paint the dice. I used wood paint to paint the dice, its surface would be similar to glass so most markers won't stick well. The painting process is similar to the industrial painting of dice: put a lot of paint then remove the excess with a polish.
- As mentioned in the previous step, the final touch would be to polish the dice. I used cerium powder which is usually used to remove scratches on glass surfaces. They're easy to use and readily available.
- Congratulations, you just made your own gemstone dice!

Next tutorial would be about other polyhedral dice and making a rounder d6 (a.k.a. chinese style)


I spent the whole damn week looking for a tutorial like this.Wonderful guide, I cant wait to make my own!
ReplyDeleteI have some Jasper at home, do you think it would last long?I dont understand much abour gems
ReplyDeleteThis was super helpful. Thank you!
ReplyDeleteIncredible guide.. had a feeling could be done with very few tools, and you made the process as simple as possible. Thank you very much
ReplyDelete